Creating Invoices
Generate professional invoices from approved sessions with live preview, custom line items, and PDF export.
Once you have approved work items in the "Ready" tab, you can create invoices to send to your clients.
Starting a New Invoice
- Go to the Invoicing page (via sidebar or from Timesheets)
- Click New Invoice
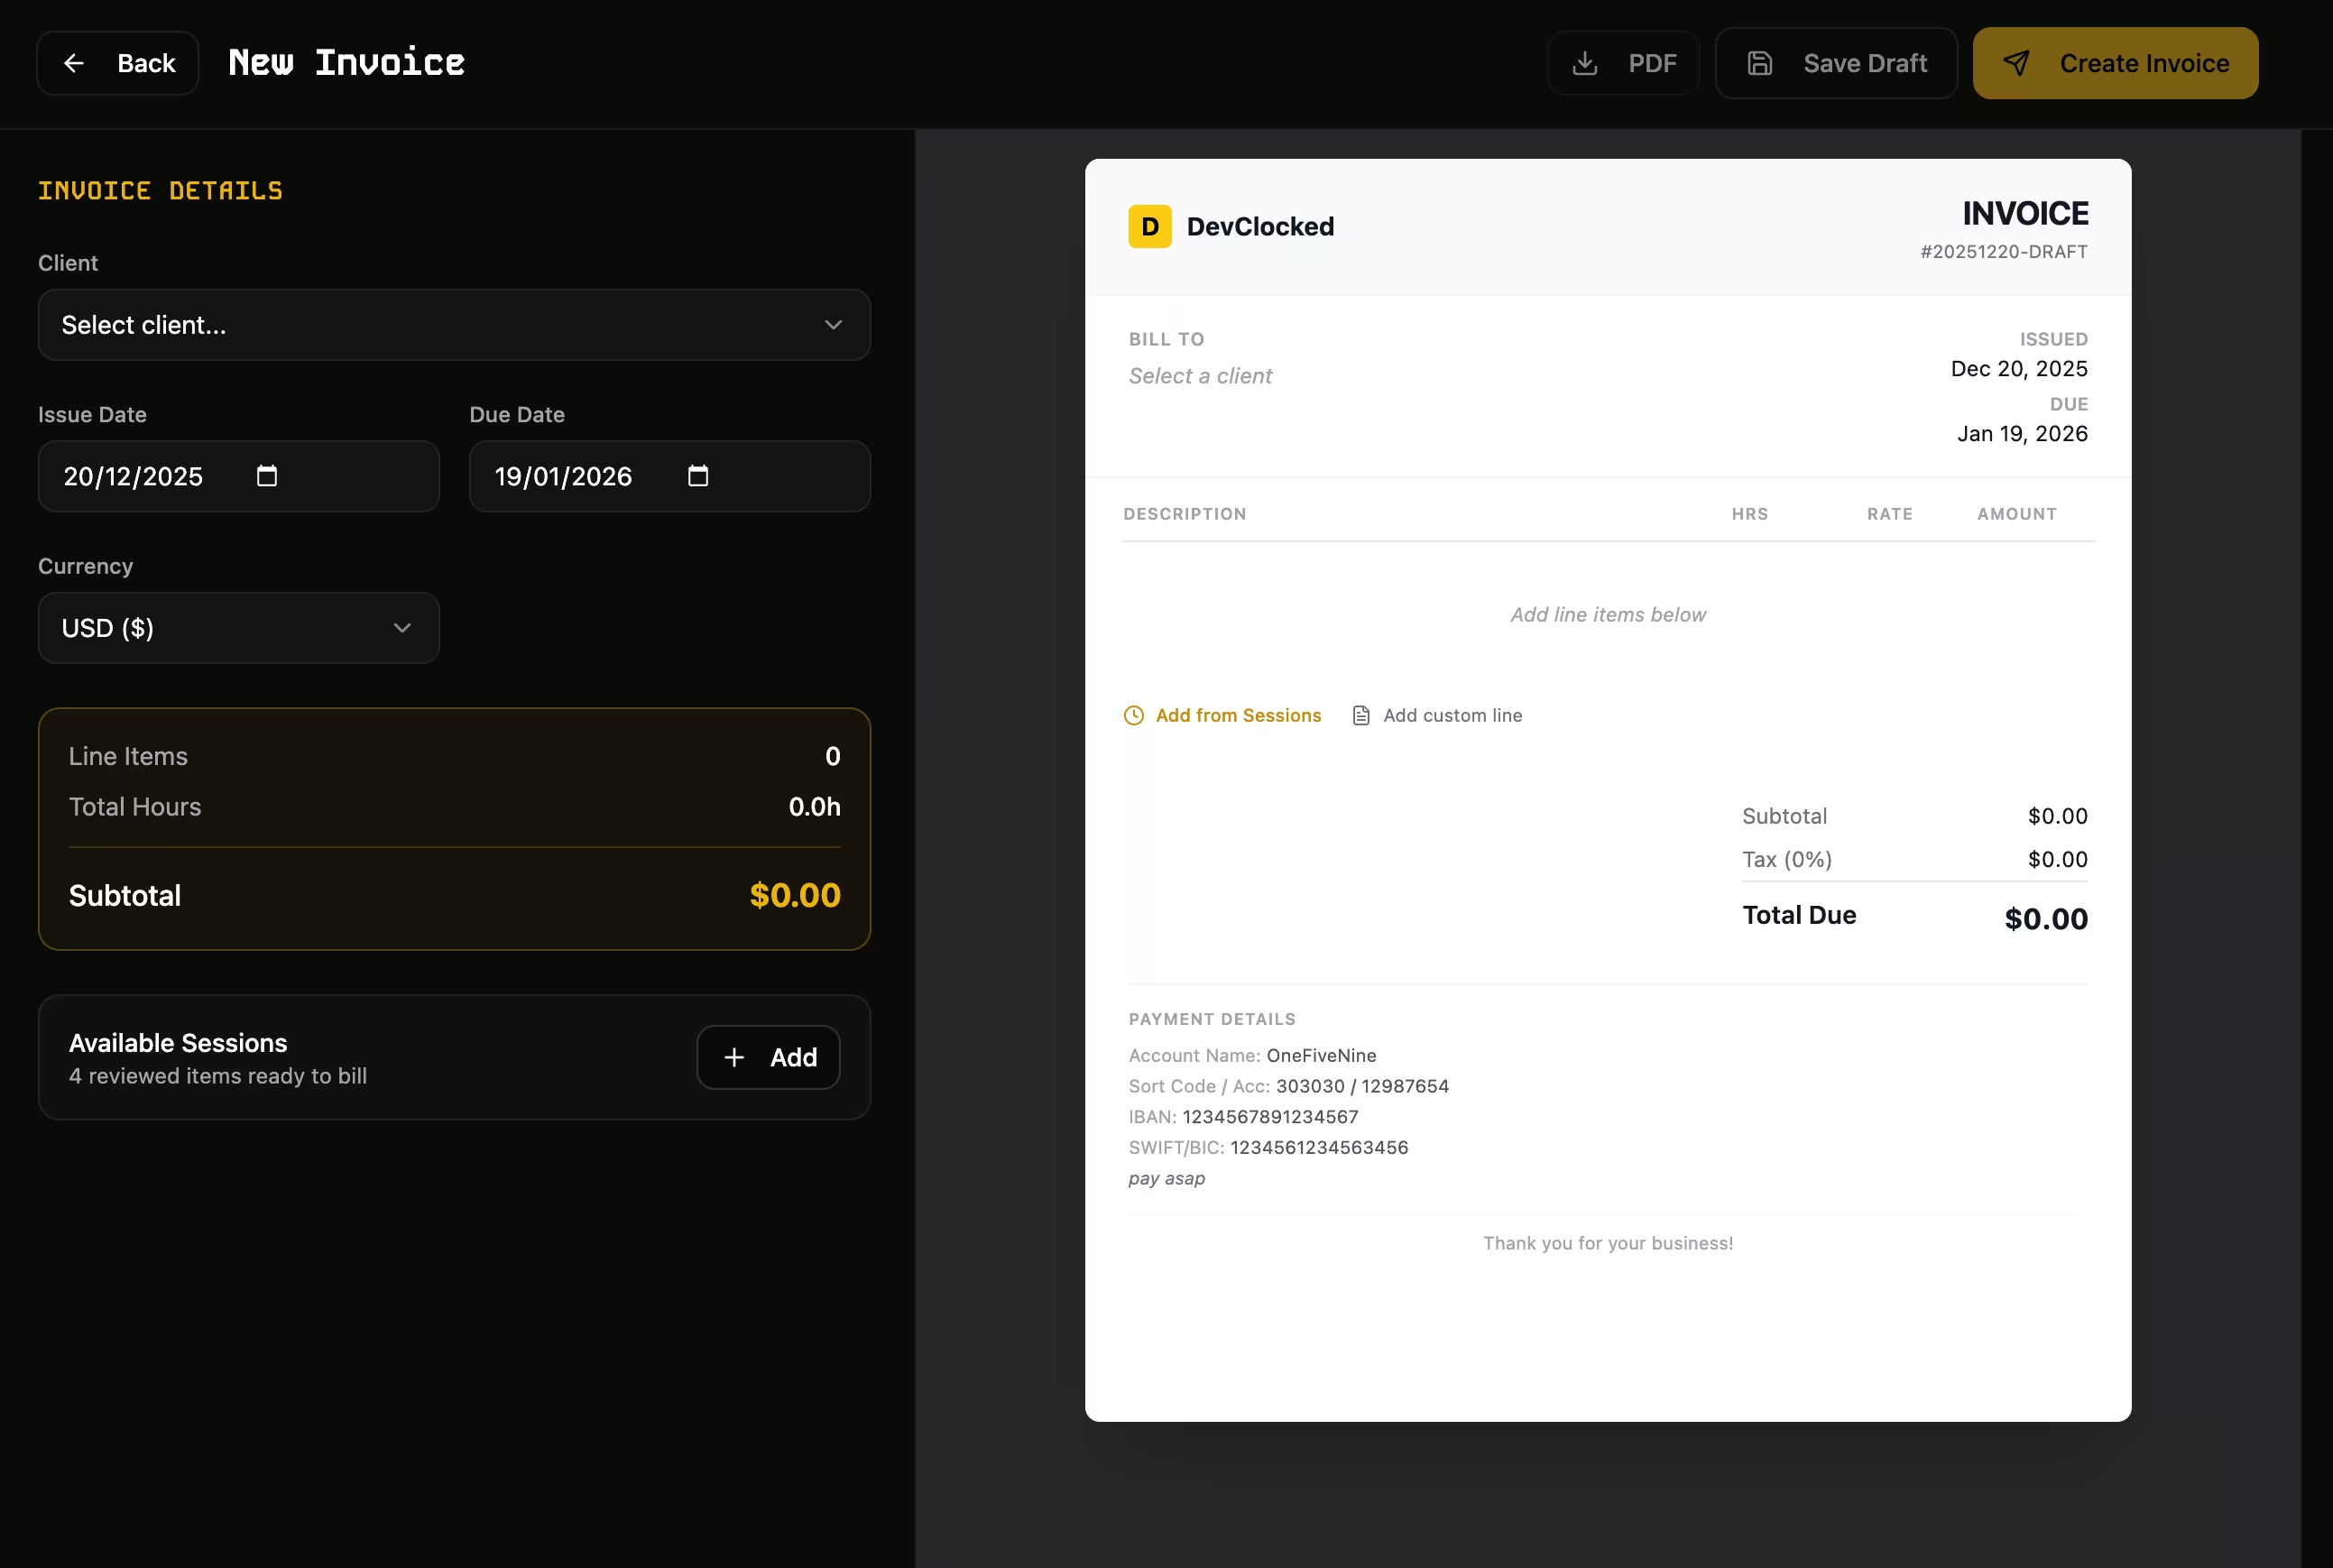
Invoice Details
On the left panel, configure:
- Client — Select who to bill
- Issue Date — When the invoice is issued (defaults to today)
- Due Date — Payment deadline (defaults to 30 days)
- Currency — USD, EUR, GBP, or AUD
Adding Line Items
There are two ways to add items:
- Add from Sessions — Click to open a sheet showing your approved work items. Select items and they'll be automatically aggregated by category with proper hours and rates.
- Add Custom Line — Manually enter a description, quantity, rate, and amount for expenses or fixed-fee items.
Live Preview
The right panel shows a real-time preview of your invoice exactly as it will appear when downloaded. All edits update instantly.
Editing Line Items
Click any line in the preview to edit:
- Description text
- Hours/quantity
- Rate per hour
The amount auto-calculates as you type.
Save or Create
- Save Draft — Save without finalizing. You can edit later.
- Create Invoice — Finalize the invoice. Work items will be marked as "Invoiced".
Was this page helpful?